
Welcome to our newest guide on how to upgrade the MicroSD card on your Nintendo Switch to a bigger capacity card!
Small disclaimer, more ways might exist to do this, our method worked on two separate Switch consoles. Do not take this guide as the only way this is possible, it worked for us 🙂
Instead of constantly removing my downloaded games, I recently decided to upgrade my microSD card to a higher capacity, as I only had a 16-gigabyte card up till now, one that I already had around the house. I ended up buying a new 128-gigabyte card and here is my guide on how to upgrade your microSD card.
Important to know is that this way does not copy over your screenshots! Those remain on the old microSD card.
Nintendo already confirmed the maximum capacity would be 2 Terabyte when these become available, for now, 128 appears to be a good choice, both size-wise and budget-friendly.
Keep in mind, this is the only solution I found so far, there may be other solutions down the line, but right now, this is the only one I found to be working as I even tried cloning my old card onto the new, reformatting in a variety of file formats, each time copying over my info, each time failing.
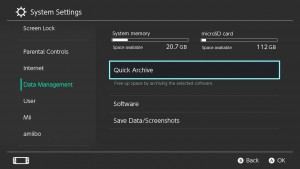
So, what do you need to do? Use a built in function called QUICK ARCHIVE, this can be found under data management in the system settings. While this will remove all downloaded data, it will not remove your save file.
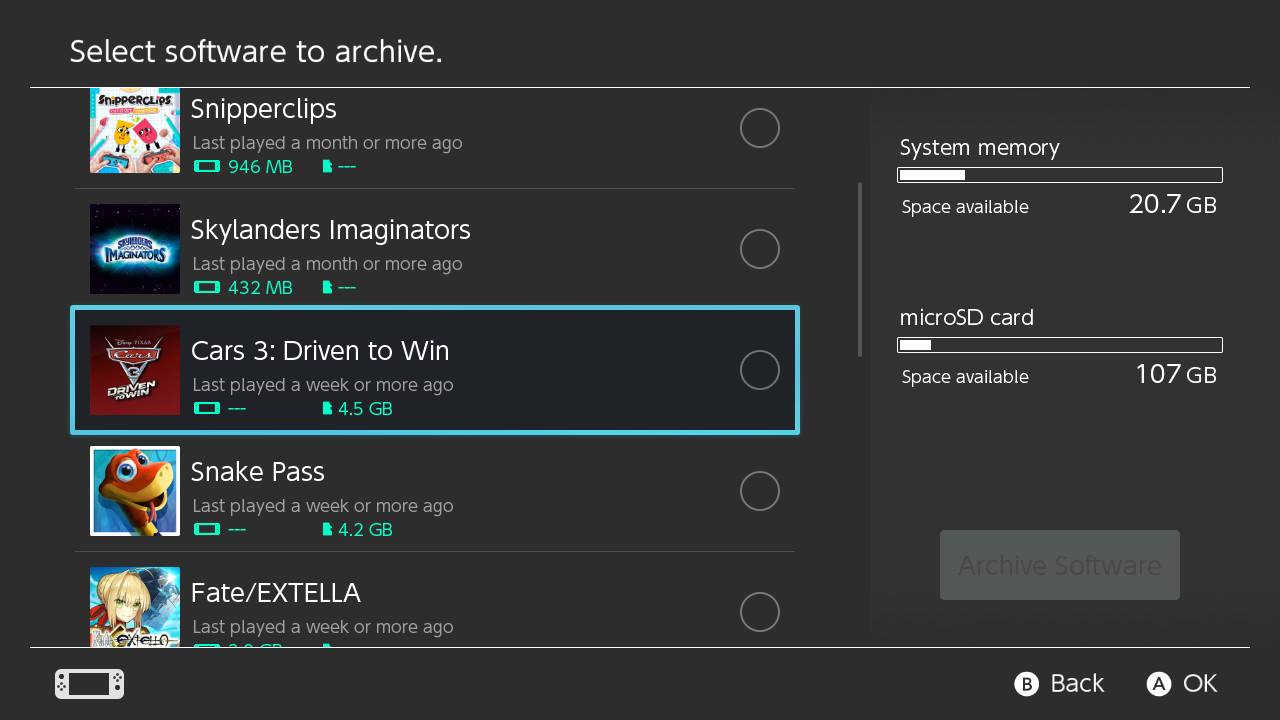 |
| On my Screenshot, it shows the Cars game having only data on the microSD card, that is exactly what you need to archive, the ones without information on the microSD do not need to be archived at all! |
Once you archived everything on the microSD card inside the Switch, it is time to shut down the Switch in order to swap cards. Like always, press the power button a few seconds in order to show the advanced sleep functions, select the complete shutdown and wait for the Switch to shut down and replace the old card with the new one!
Once the new one is placed, boot up the Switch and upon loading, the system will give you an error code, telling you it did not find the microSD card you just inserted, close the warning message and go into your system settings again, all the way down into the System option, where you need to enter the formatting options.

Enter your code to access this part of the Switch!
Once you are there, select the Format MicroSD function and let it do its’ thing! Now all that is left, are the old game icons with a little cloud icon on top, telling you to the files need to be downloaded again, which you need to do for every single game…
I know, this is the annoying part taking quite a while before it is done, but that is how I found you can update your microSD card without losing your save games, but with the hassle of downloading everything again!
I verified this works by immediately playing both my Gonner game as well as Death Squared, both still had everything on it, did not lose any progress at all.
Should you find another way to do this, let us know in the comments!